
Start here
This page explains what the app does, what you need, and how to get going.
What the app does
Sanestly Warranty & Repair helps you handle problems after a sale:
- A customer reports a broken or wrong product - it becomes a case.
- You read the case, talk to the customer, and decide what happens: repair, replacement, refund, or decline.
- The app tracks the case through each stage, from submitted to closed.
- Customers can check progress themselves on a page called the portal - fewer "where is my repair?" emails for you.
- On bigger plans you can also create work orders (repair jobs), work with outside repair shops, and see reports.
What you need before starting
- A Wix store with Wix Stores products and at least a few orders.
- The app installed from the Wix App Market:
- Open your Wix dashboard.
- Go to Apps (left menu) -> search "Sanestly Warranty and Repair" -> click Add to Site (or install it from the App Market listing).
- Ten minutes for the first setup (see below).
Good to know: installing the app does not change your shop pages. Customers see nothing until you place the "My Warranty" element or share the claim link (see Customer portal).
Your first 10-minute setup
Open the app: Wix dashboard -> Apps -> Manage Apps -> Sanestly Warranty and Repair -> Open.
You land on the Overview tab. Top tabs are how you move around the app.
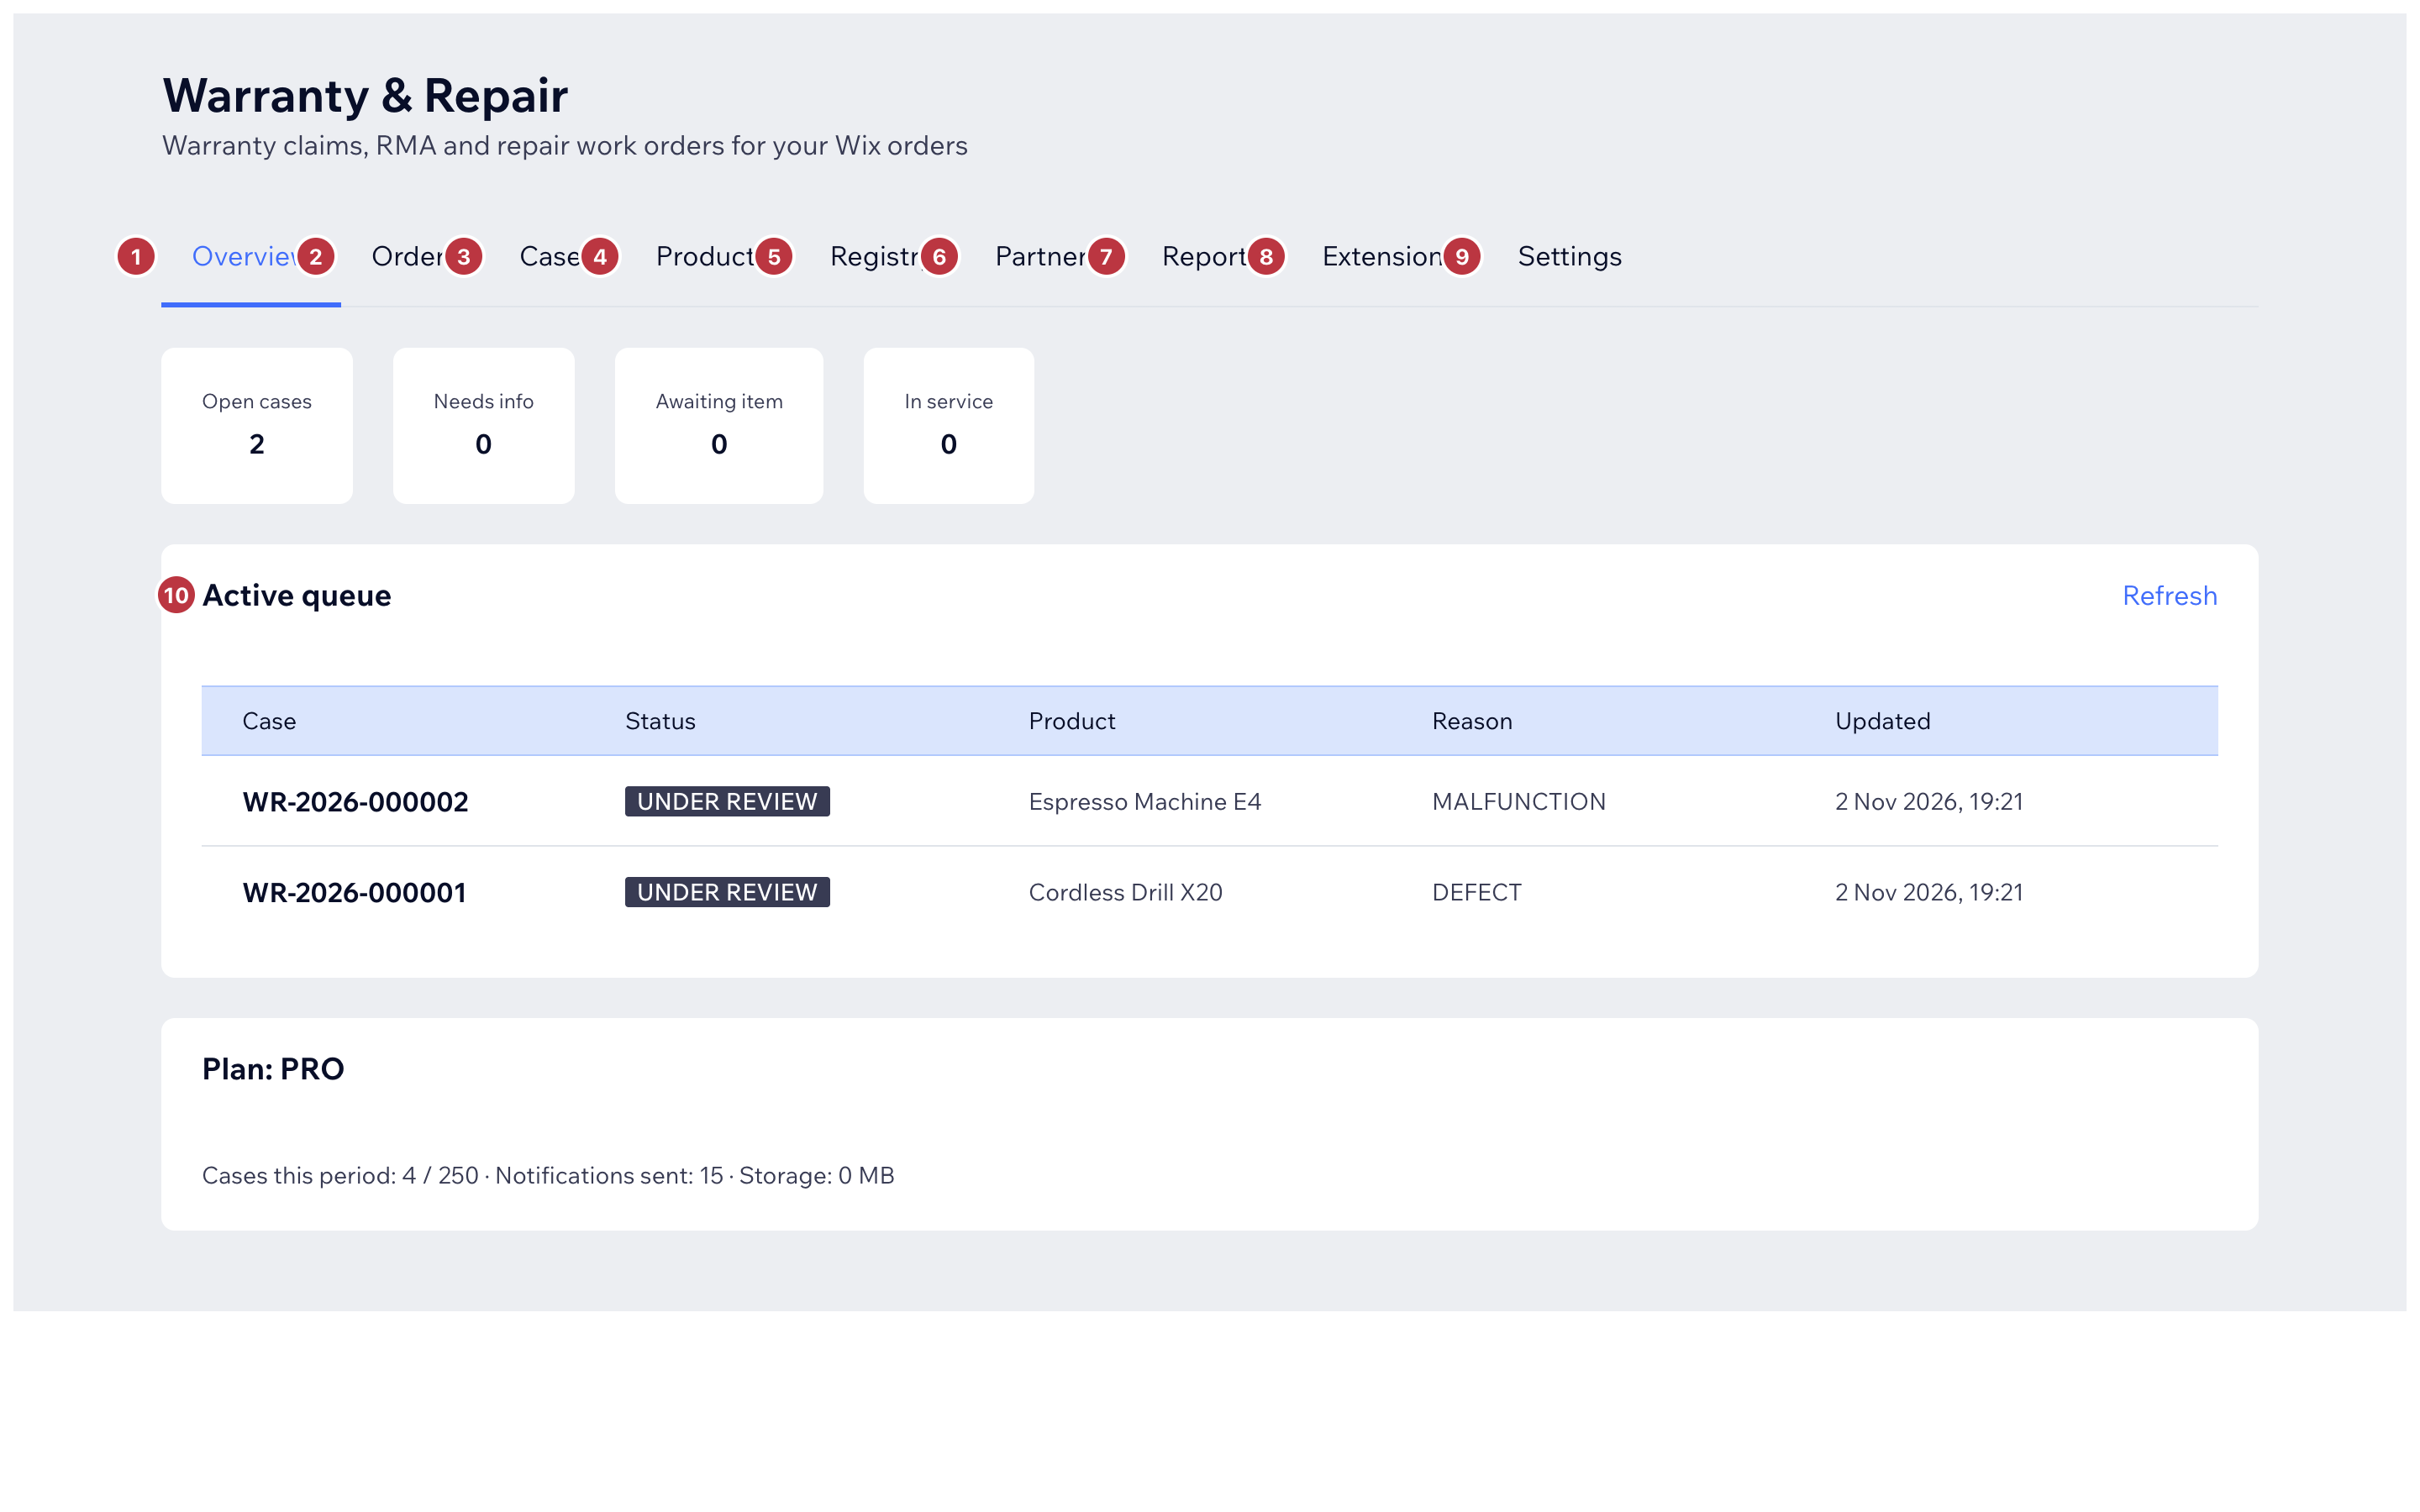
The app overview page *In the picture: 1-9 are the main tabs (Overview, Orders, Cases, Products, Registry, Partners, Reports, Extensions, Settings). 10 is the "Active queue"
- the open cases waiting for you.*
Click the Settings tab and fill in the Workspace card:
- Business name - shown in customer emails.
- Support email - where customer replies and test emails arrive.
- Press Save settings.
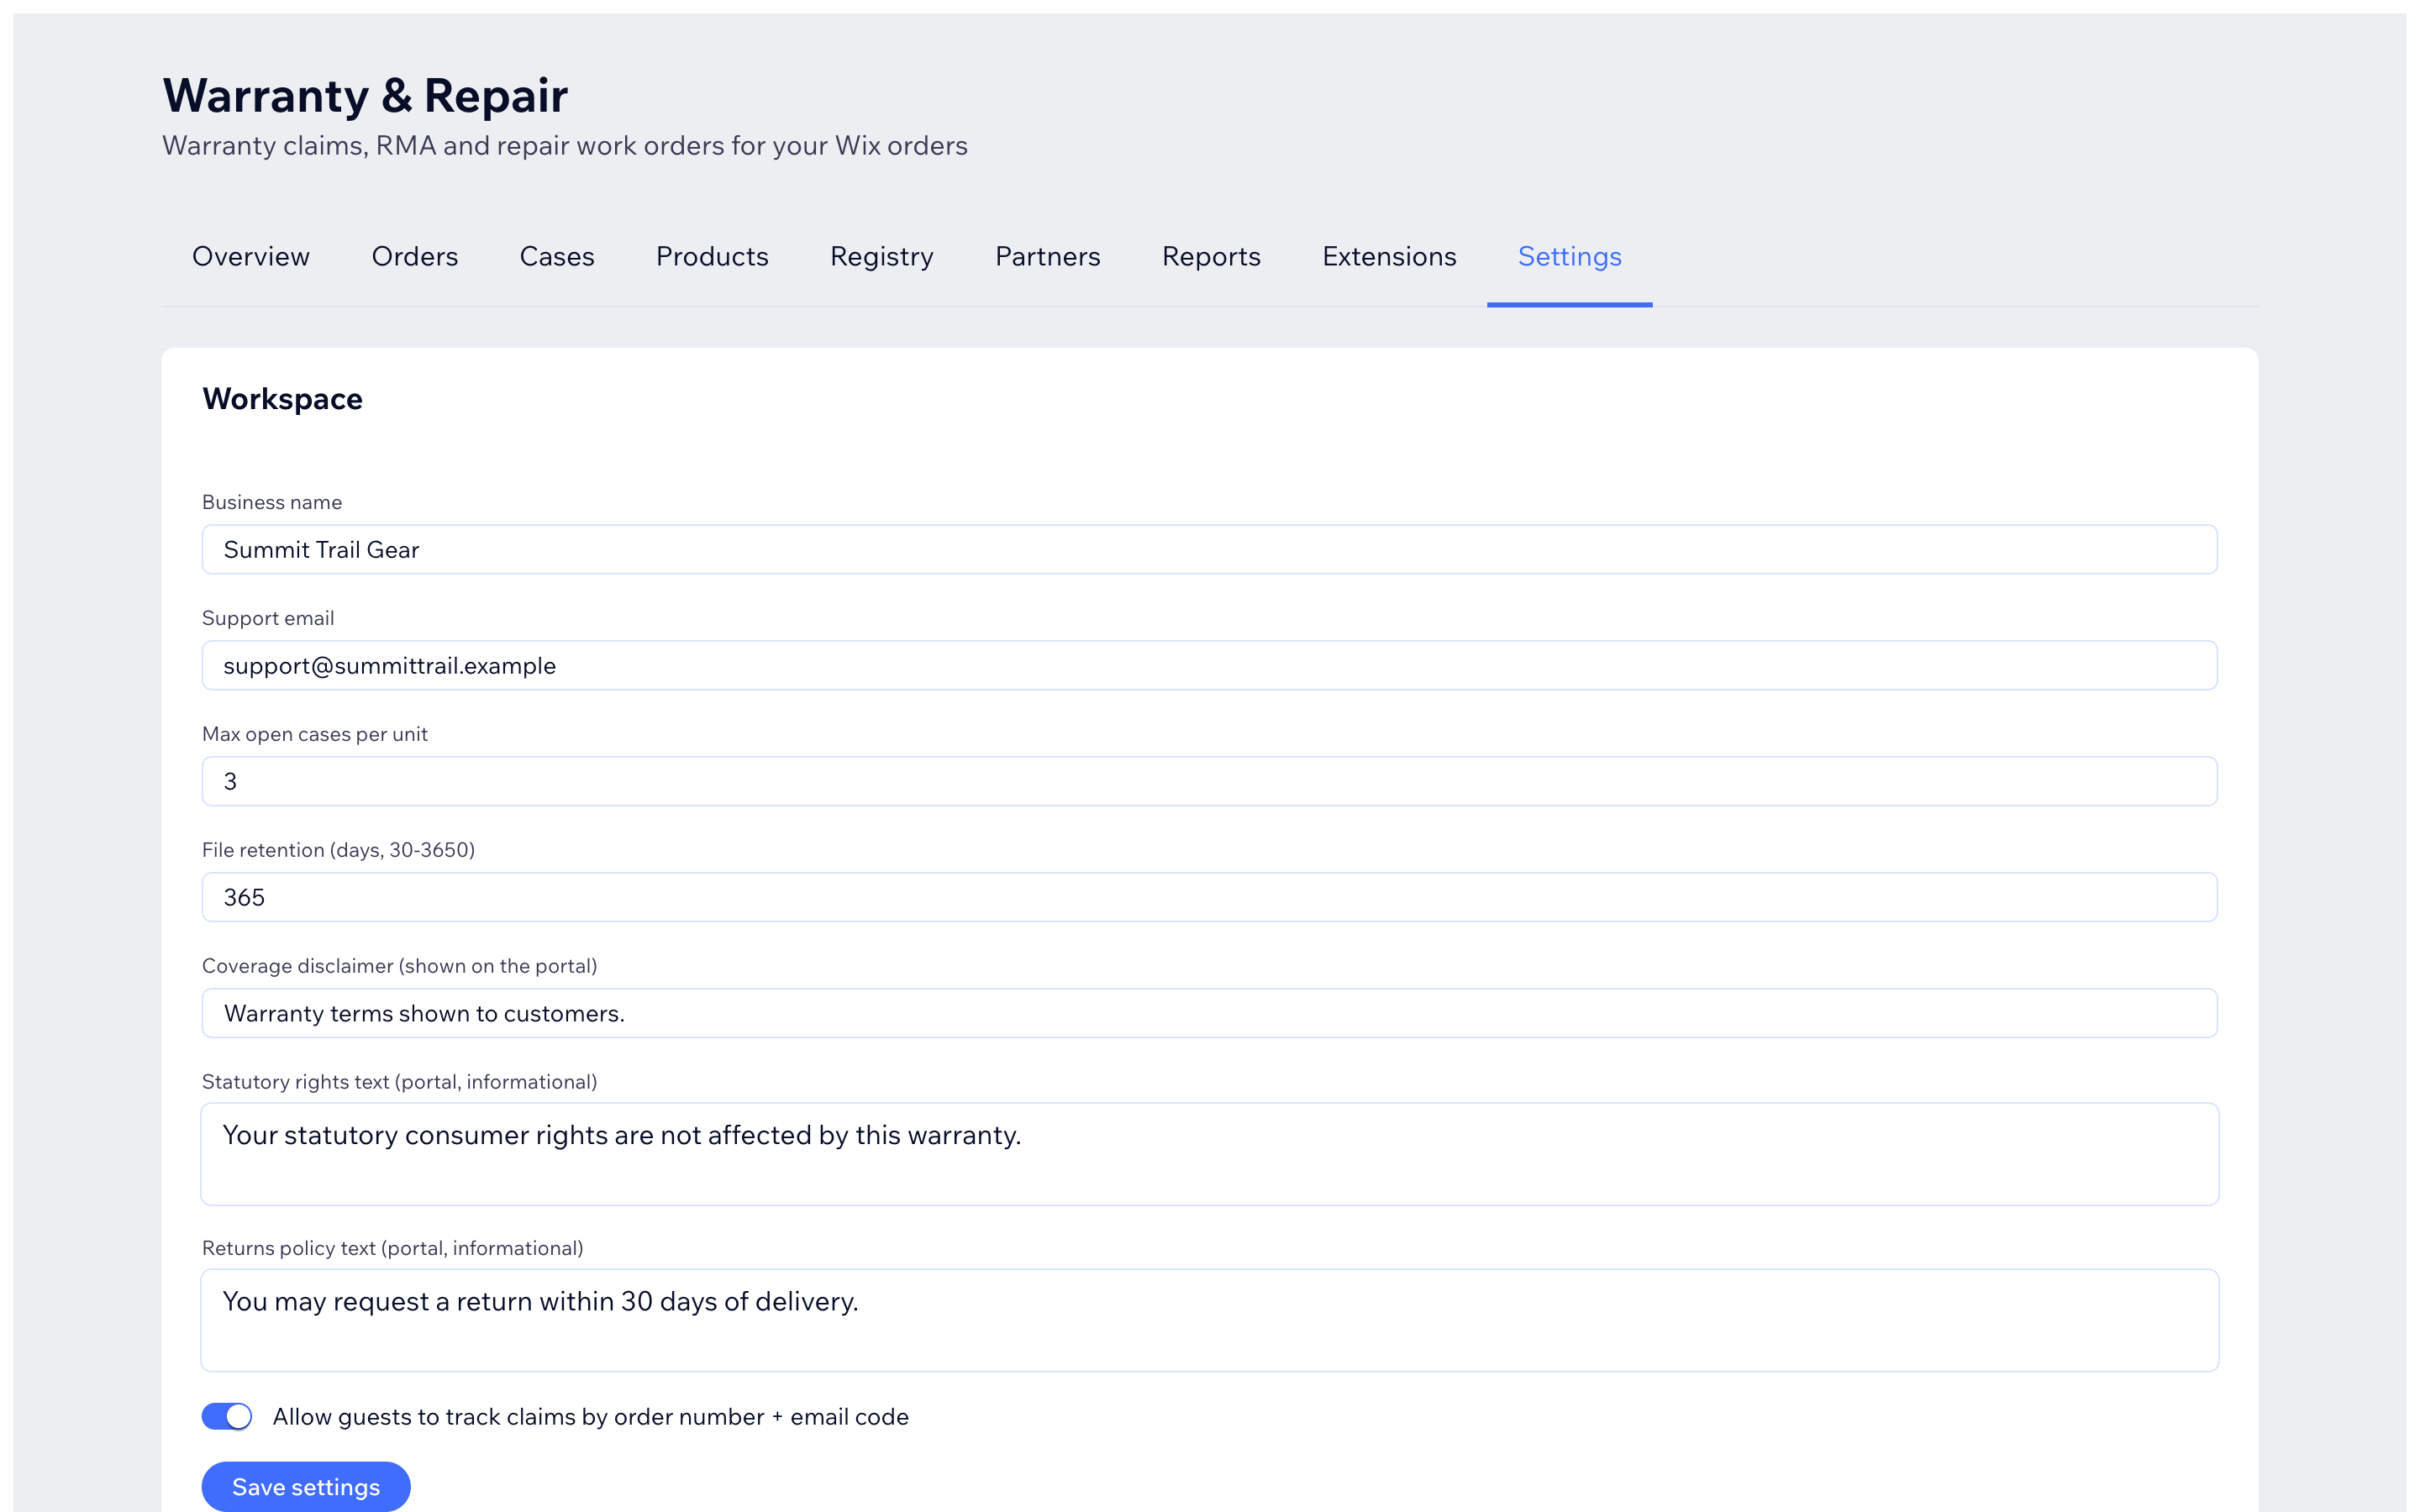
In the picture: the Workspace card on the Settings tab. Still in Settings, scroll to Warranty products:
- Choose the default: "All products eligible unless excluded" is the easy start, or "Only configured products are eligible" if you want strict control.
- Press Save warranty settings.
Optional: in Settings -> Customer email notifications, keep the pre-filled emails or press Edit on one to change the wording, then Save notification settings.
In Settings -> Connection & data, press Sync orders now once so older orders are loaded. New orders arrive automatically after that.
Done - you are ready for cases. Next: the First 15 minutes walkthrough.
The main areas of the app
| Tab | What it is for |
|---|---|
| Overview | Today's queue: open cases, quick numbers, your plan usage |
| Orders | Your Wix orders; start a case straight from an order |
| Cases | The main list of customer requests and your work on them |
| Products | Your Wix catalog, warranty setup and aftercare actions per product |
| Registry | Physical items with serial numbers ("units") |
| Partners | Outside repair shops (Pro plan) |
| Reports | Numbers and CSV export (Pro plan) |
| Extensions | Selling extended warranty cover (optional, all plans, needs opt-in) |
| Settings | Workspace, warranty rules, emails, team, integrations |