
Working with cases
A case is one customer request - a warranty claim, a repair, a question, a return. This page covers the whole life of a case.
The cases list
Open the Cases tab:
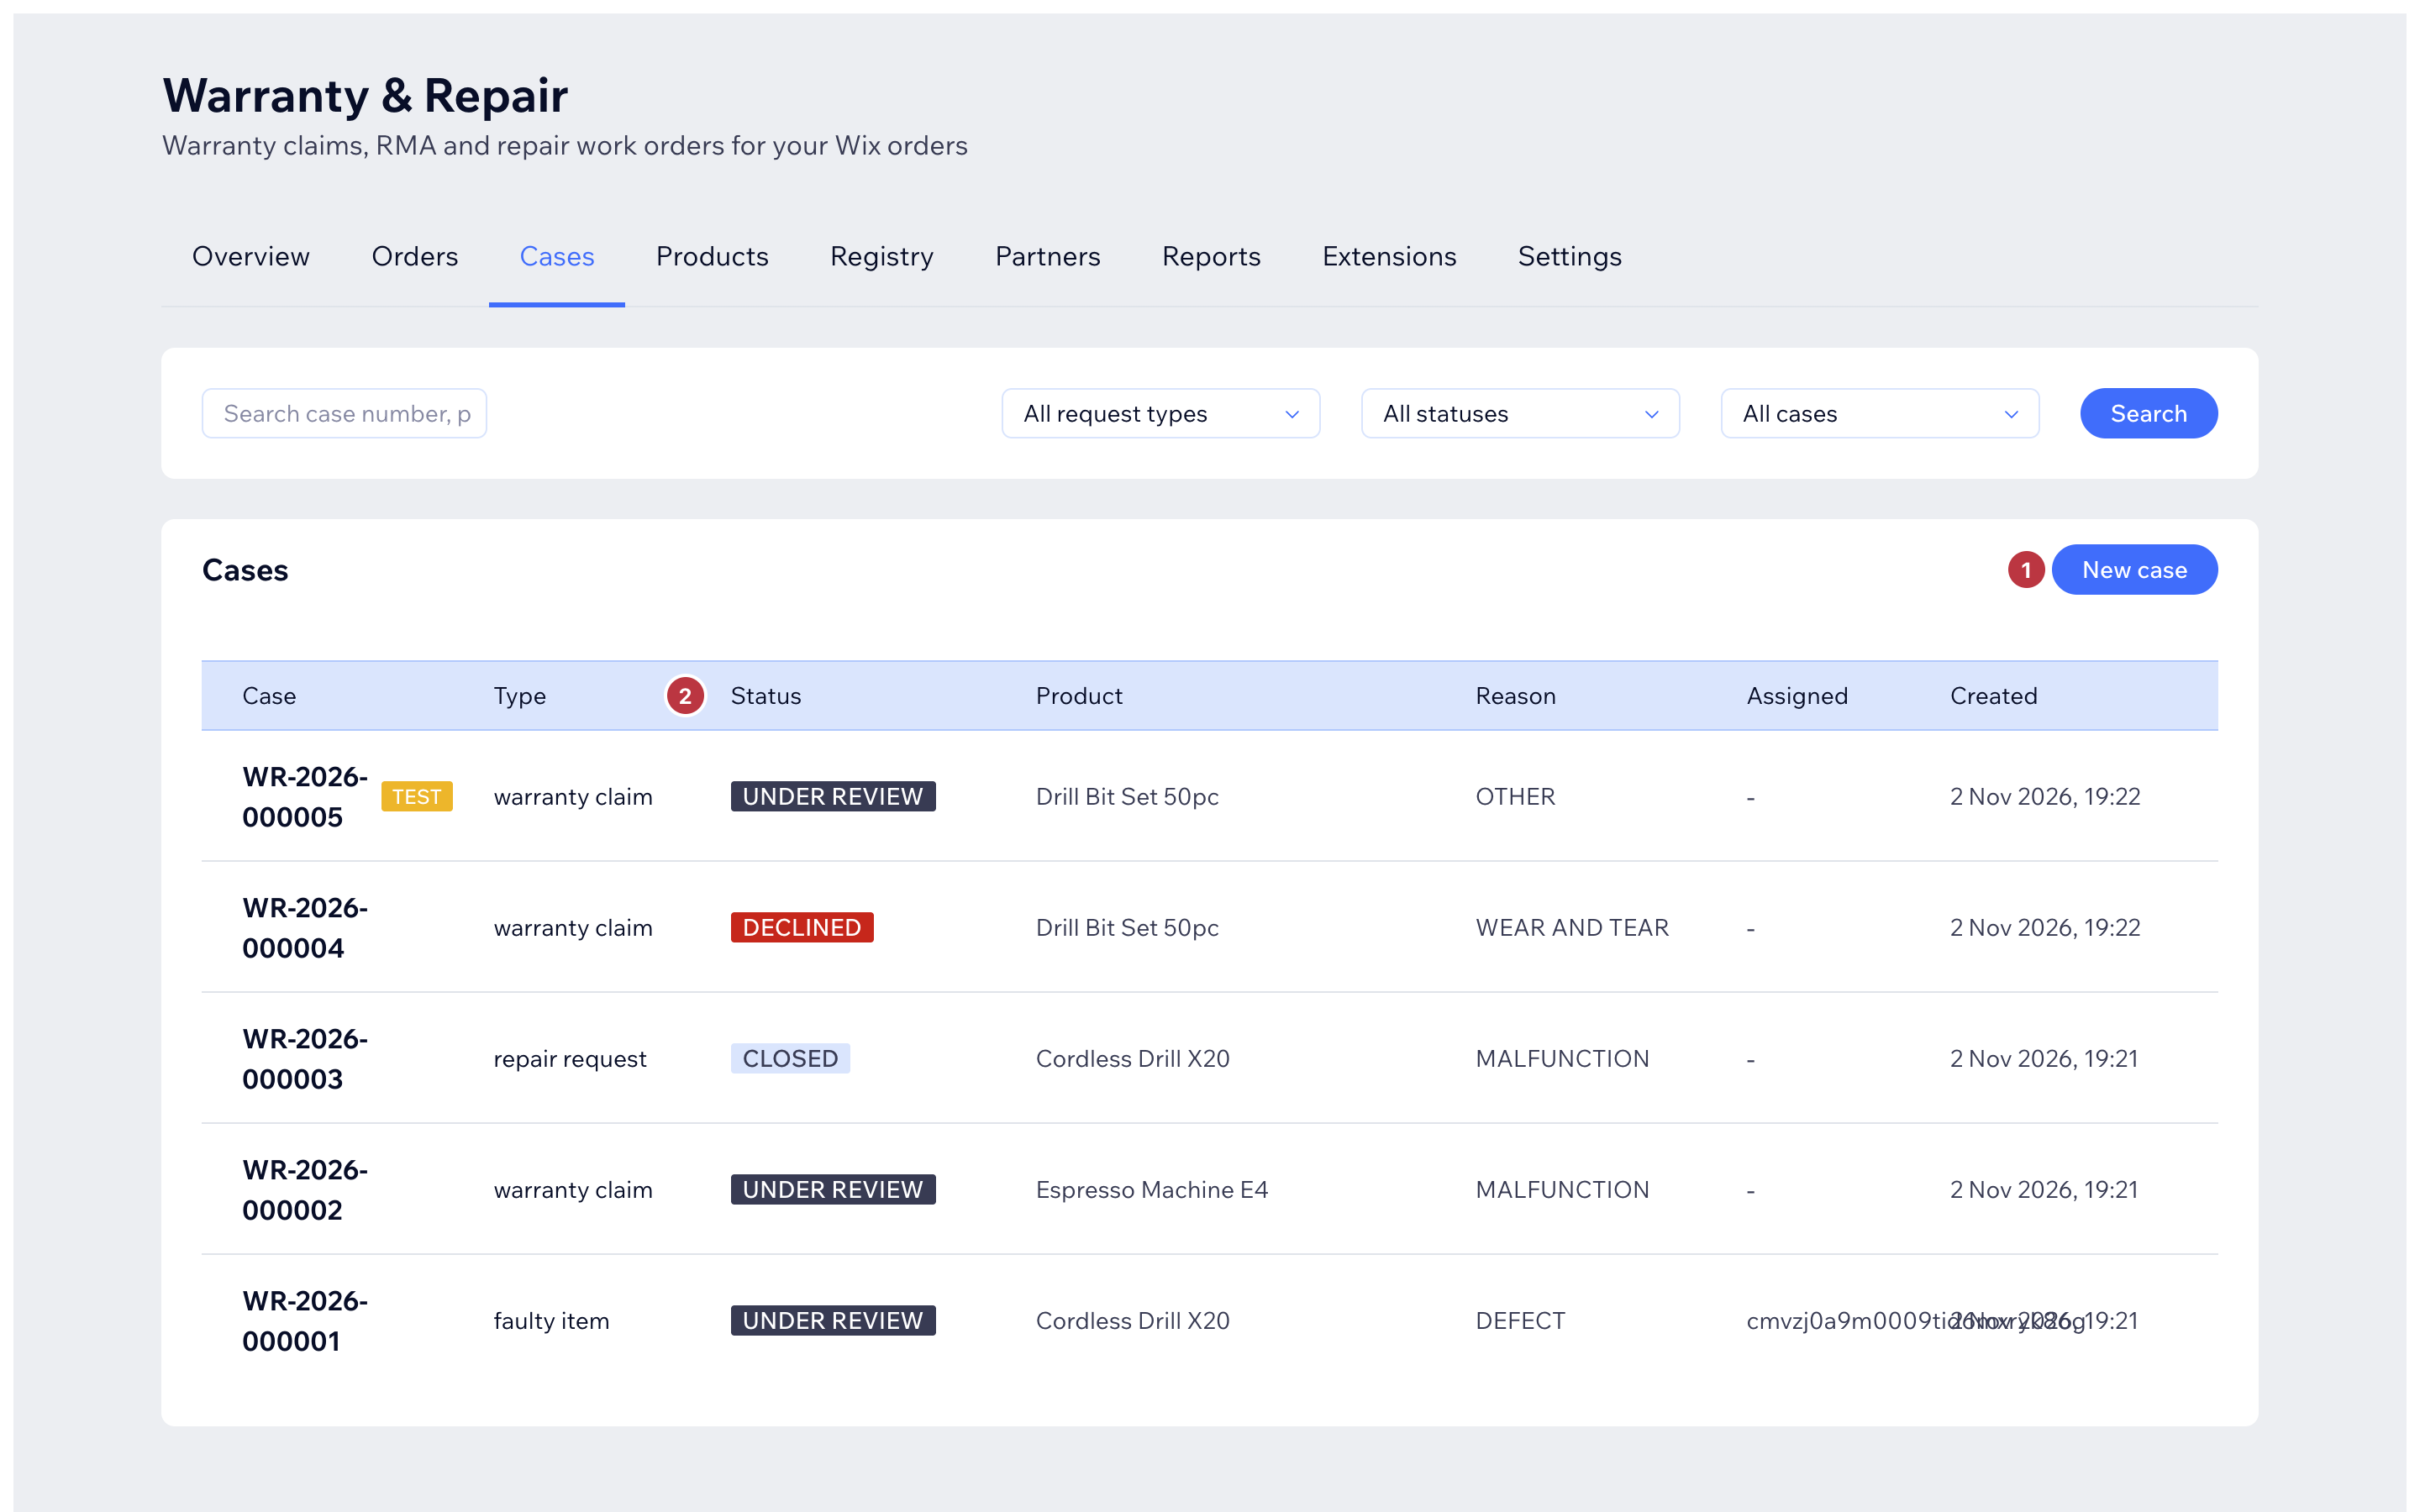
- Search by case number, product or customer details.
- Filter by request type (warranty claim, repair request, faulty item...) and status. The All cases filter can also show test cases.
- Rows marked TEST are safe test cases: they do not use your plan quota and never email customers. Open one to Delete test case.
- Unmatched engineer reports appear under the list when a form submission could not be linked to a case - enter the case number to file it, or ignore it (see Work orders and engineers).
Open a case (from an order)
The fastest way when you know the order:
- Orders tab -> click the order.
- Press Create case from this order.
- Pick the item(s), choose the request type and reason, write a short description, and confirm the customer email.
- Press create - the case gets a number like
WR-2026-000123.
Open a case (manually)
Cases tab -> New case.
Search by order number or customer email, press Select on the order.
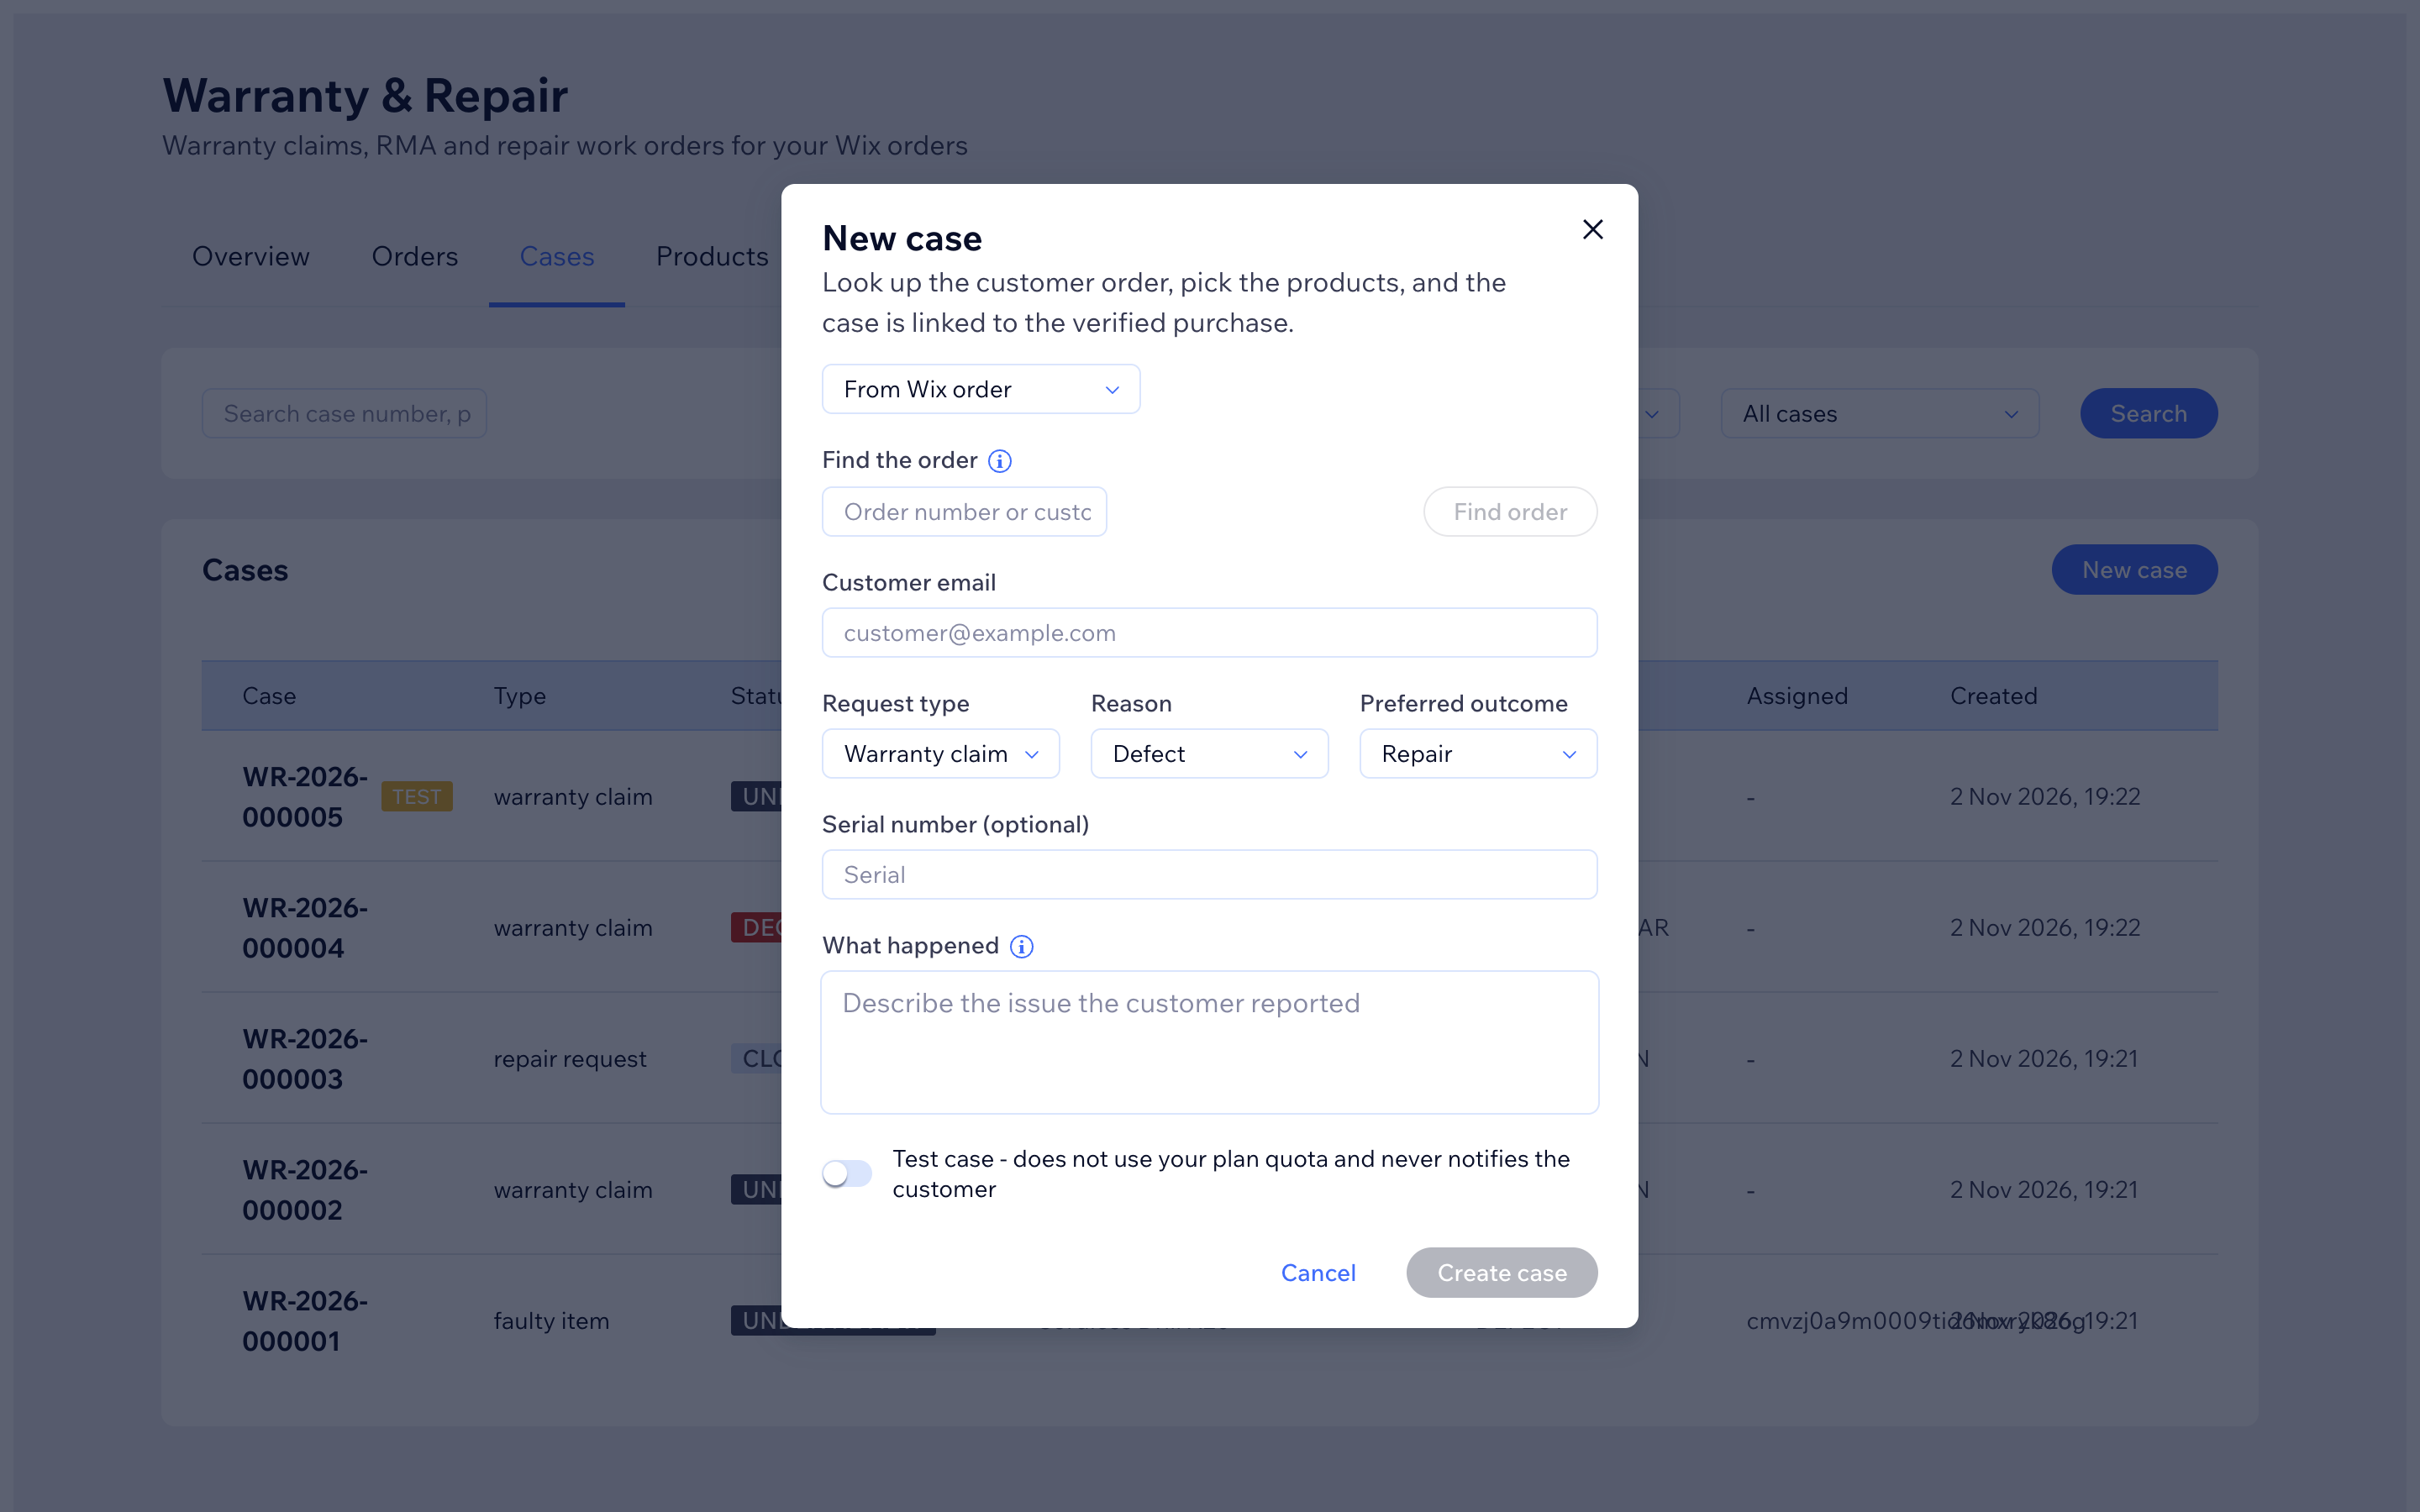
New case window Tick the item(s) the case is about, or check the box for a case without a linked order item.
Fill in: customer email, serial number (optional), the problem description, and - for sales made outside Wix - a short note in manual justification (e.g. "in-store sale, invoice #1042").
Keep Test case unticked for real work. Press create.
The case page
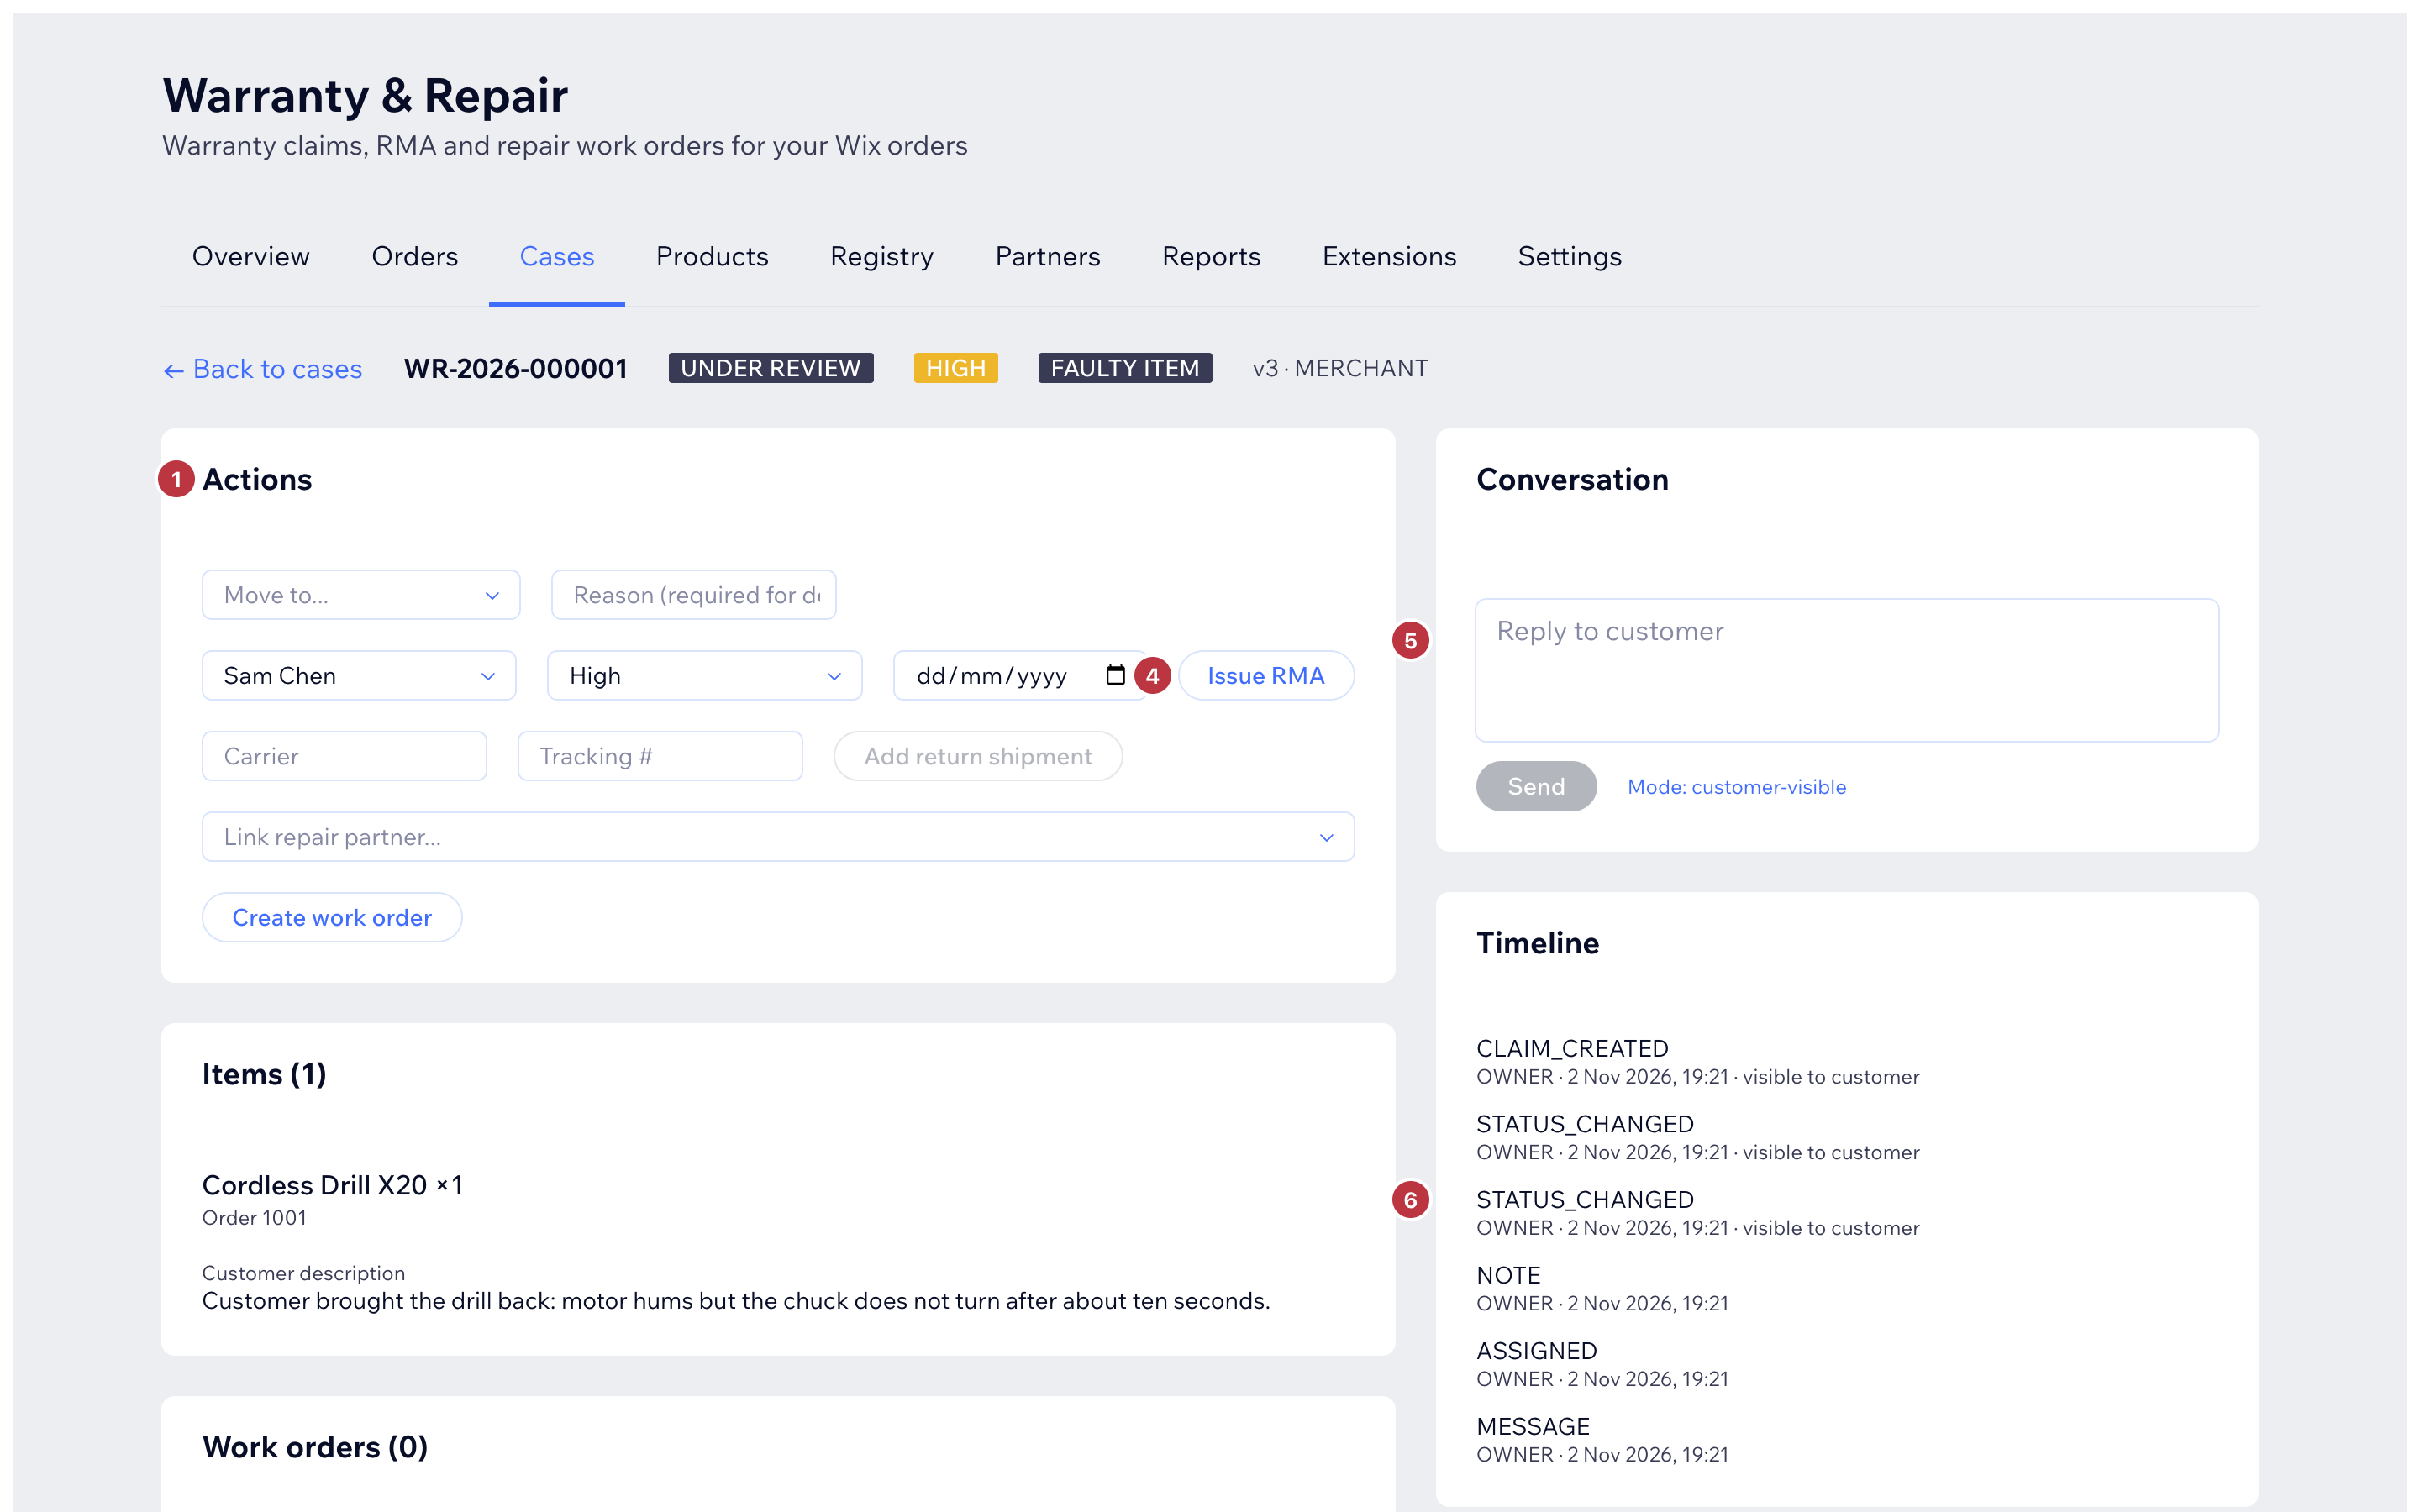
Everything about the case lives here:
- Actions card - move the case to the next status, assign it, set priority (low / normal / high / urgent) and a due date.
- Items - the product(s) in question, with order and serial.
- Work orders - repair jobs, see Work orders and engineers.
- Engineer reports - visit reports from your form or added by hand (Add report).
- Evidence - photos and documents attached to the case.
- Conversation - your chat with the customer. Toggle internal to write a private staff note the customer never sees.
- Timeline - every event, in order.
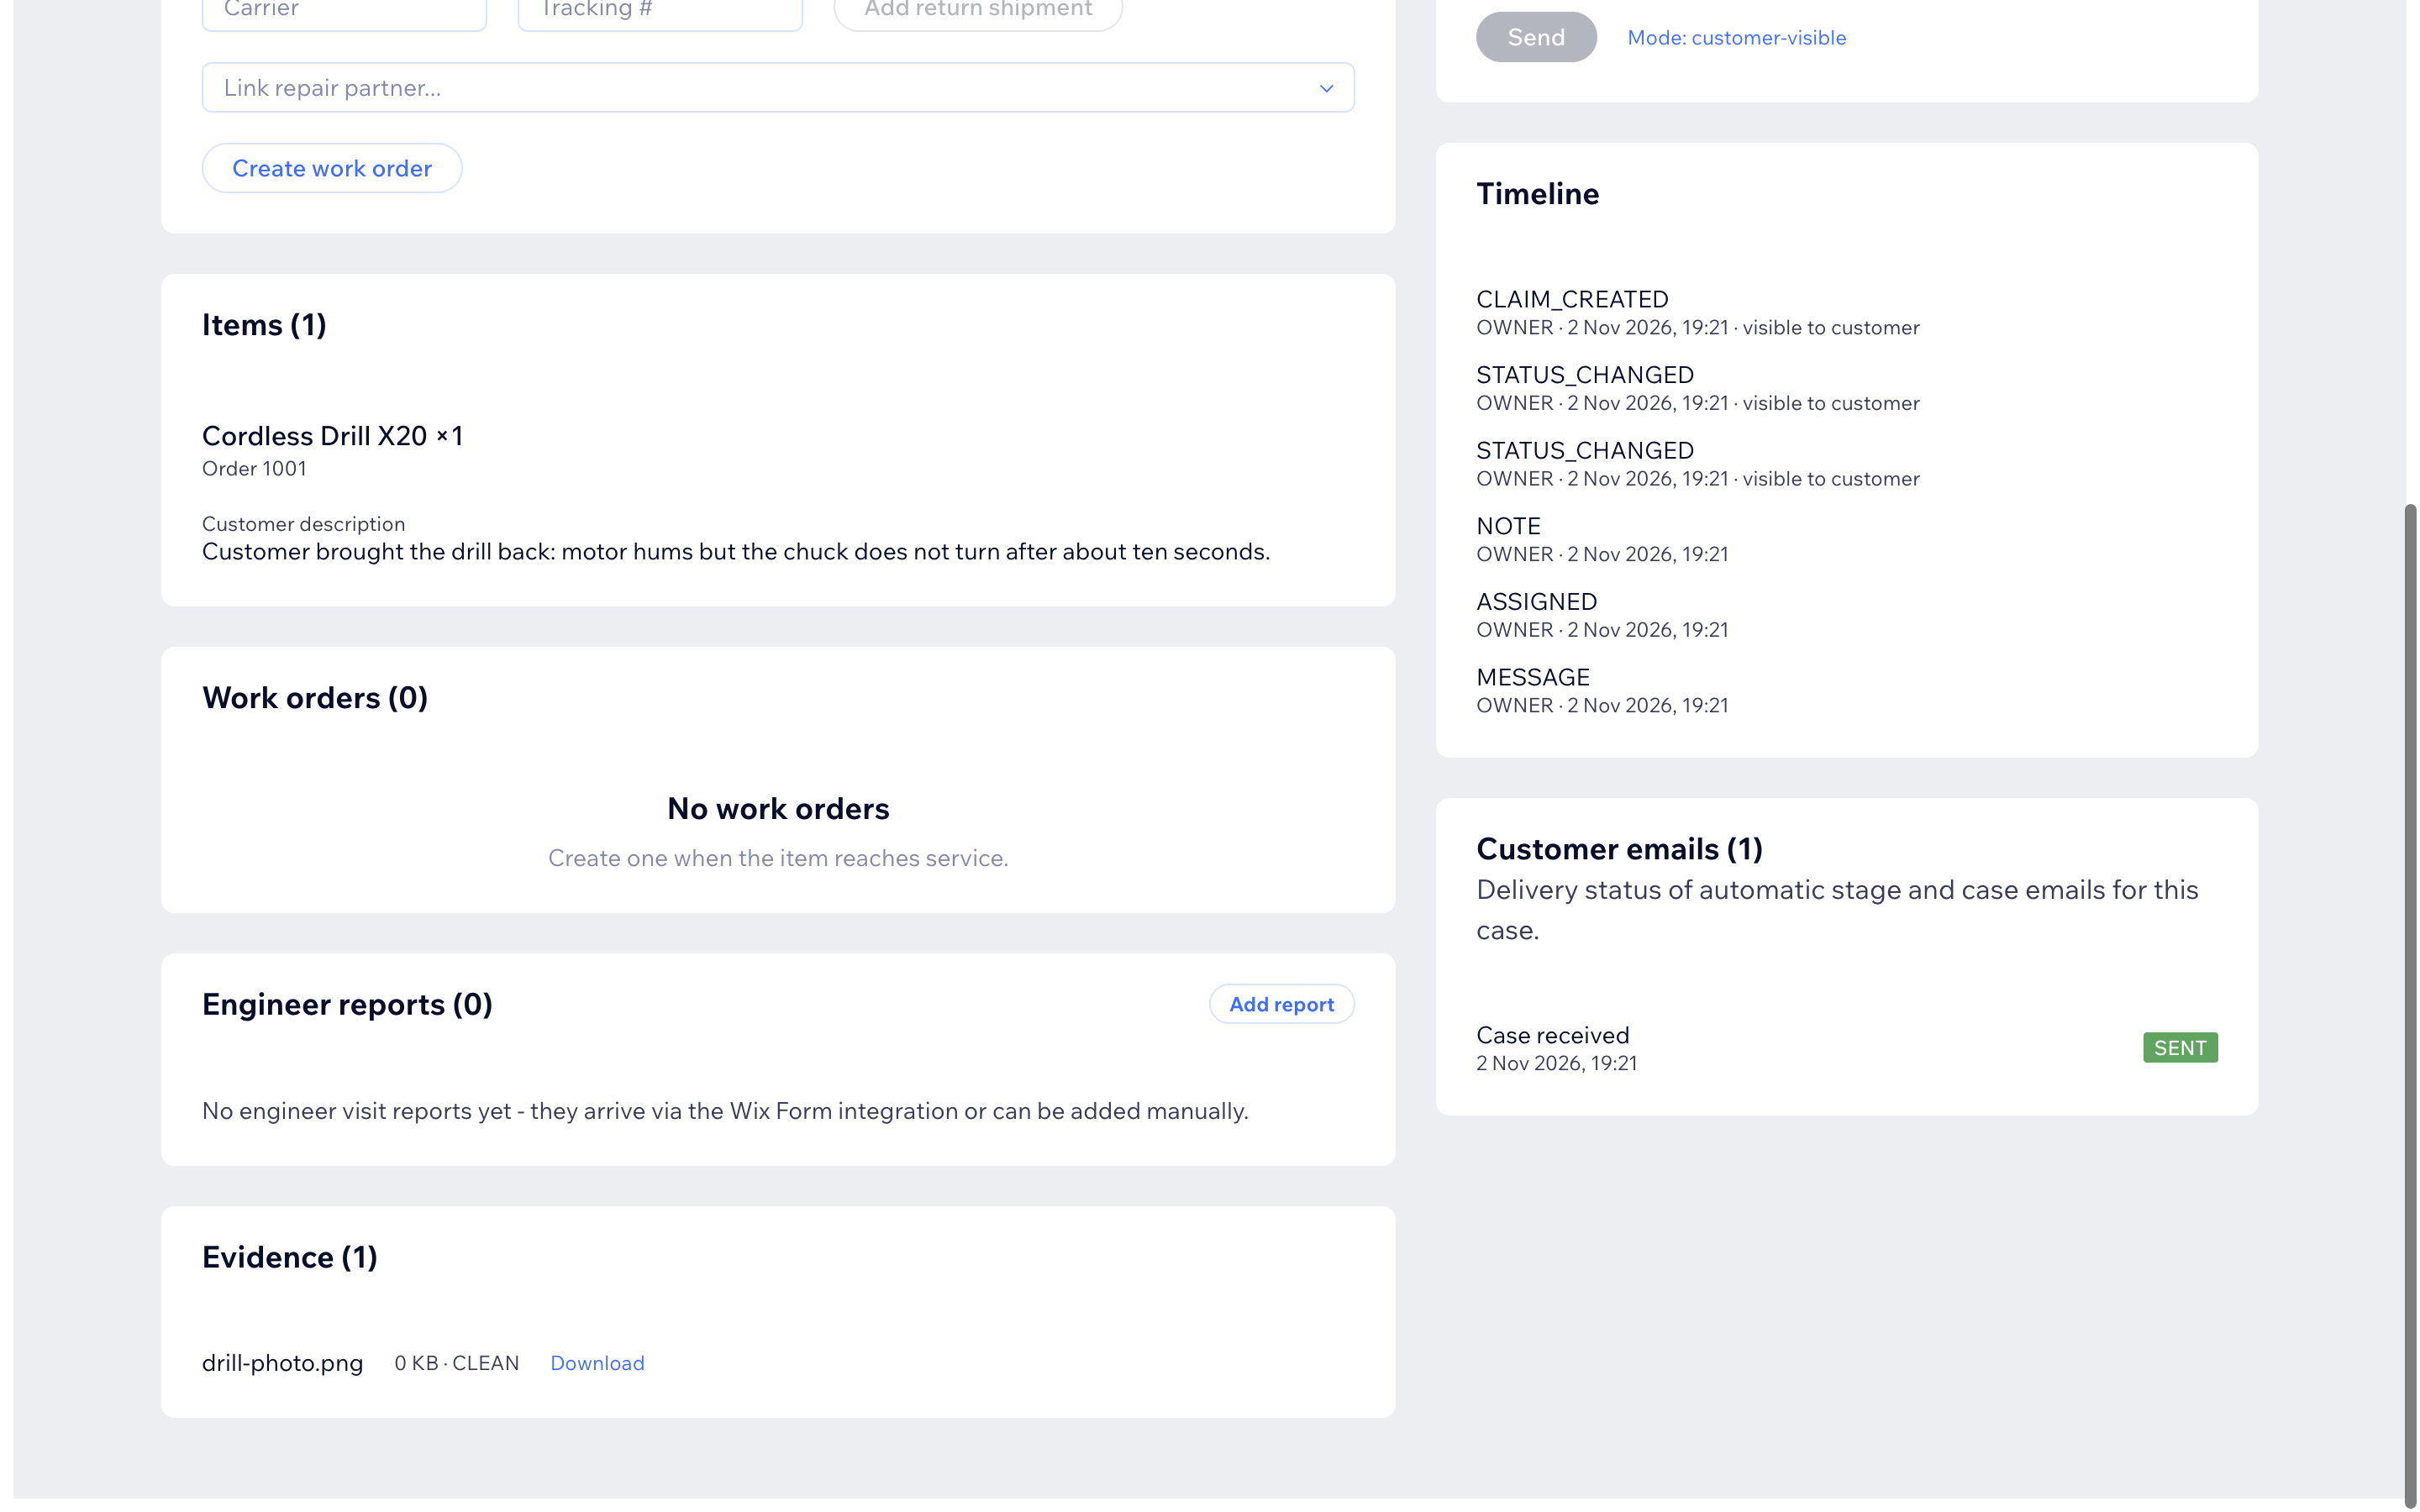
- Customer emails - which automatic emails were sent for this case and their delivery status.
Case statuses, in plain words
| Status | Meaning |
|---|---|
| Submitted | The customer (or you) sent it in |
| Needs info | You are waiting for details from the customer |
| Under review | Your team is looking at it |
| Approved for return | The customer may send the item back |
| Remote diagnosis | You try to fix it without a return |
| Awaiting item | You are waiting for the item to arrive |
| Received | The item is with you |
| Under service | The repair work is happening |
| Resolution ready | Done - ready to ship back or close |
| Shipped / Delivered | The item is on its way back / arrived |
| Closed | Finished |
| Declined | Rejected (always needs a written reason) |
| Cancelled | Withdrawn |
To move a case: open it, pick the next status in Move to... on the Actions card. Some moves ask for a reason (declining or re-opening always does).
RMA - letting the customer send an item back
- Move the case to Approved for return.
- Press Issue RMA - the app creates an RMA number (e.g.
RMA-WR-2026-000123). (Requires Starter plan or higher.) - Tell the customer the number - they write it on the parcel.
- When the item ships, enter carrier and tracking under Add return shipment; when it arrives, move the case to Received.
Test cases
Want to try things safely? Create a case with the Test case box ticked. Test cases use no quota and send no emails. Delete them from the case page.